|
|
|
|
|
|
| Last edited 30/12/2000
|
| 1st Continued the spray of the colour | |
| 2nd Removed all the masking tape and polished | |
| 4th Started work on inside of boot (trunk) | |
| 8th Painted fuel tank and installed windows | |
| 9th More painting of the fuel tank | |
| 11th Another day in the garage... New front beam installed | |
| 12th Chassis cleaning and painting | |
| 13th More Bitumen and engine pull | |
| 20th Cleaning the engine | |
| 21st Continued the cleaning of engine and tin | |
| 22nd Painted all of the engine tin | |
| 23rd Got the engine back in | |
| 27th Stripped the carb and fitted it |
No work today... because of this white stuff. I has not snowed in London for the last 5 year. The sea also froze today... the last time that happened was..... about 30 years ago. Temperature was down to -10, a bit too cold for the garage. Here are a few pictures of the bug and my bus.
![]()
![]()
![]()
![]()
![]()
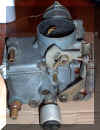
I stripped down the carb this afternoon. I was amazed at the amount of carbon in the bore. I socked the carb in cleaning solvent (a standard carb cleaner). It has come up quite nice. Most of the carbon has gone. Tomorrow I'll blow it through with the air line and then reassemble it.
Just in case you wanted to see what it looks like, here as always are a few pictures of the PIC31 4
 |
 |
 |
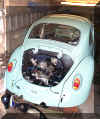
Replaced all the engine tin today then started on the reinstallation of the lump. After a few hour hard work it was in place and looking nice and clean.
 |
more to come | more to come |
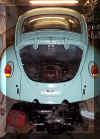
Refitted all the engine parts back onto the crankcase. New gaskets all around and all nut and bolt re-torqued. The only part that I did not fit at this stage was the carb, this still needs overhauling.
 |
 |
![]()
![]()
![]()
![]()
![]()
Today I continued the cleaning of the engine block. Over 30 years worth of grime. First I used neat petrol and a brush to remove the dirt, this was followed by neat thinners.... it seem to work well.
Once that was done I painted the inside of the engine bay. L519 back in action.
 |
 |
More of the black Bitumen applied to the bug, this time in the wheel arches and along the heater channels. This took longer than I though, a good few hours work. It was worth the effort and the shine is nice... give it that finished look.
Once the arches were painted I refitted the new metal trim and glass in the passenger door. Then Waxoiled it, keeping that rust away.
Following that came a quick tidy of the garage and the it was the turn for the engine. Yes, I pulled the engine this evening, what an easy job. I took lots of photos of the wiring for refitting reference, here. It only took abt 1 hour to get it out, that was on my own too....
 |
Just so I can remember what it was like before the clean up | 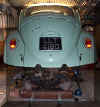 |
Today was the turn of the chassis, this I sand blasted then painted black with Hammerite. Once that was done it was time for the front inner wings, these got a coat of black bitumen roof paint. It also went on the underside of the bonnet and under the wings. I does look real clean and smooth..
 |
 |
 |
 |
I fitted a new bonnet seal, then aligned the bonnet. Its not as snug as I would have liked! :-( Never mind, its only a bit out at the top.
![]()
Well, no piece for the wicked, so they say!!! Another day out in the garage. And what a day it was. That new front beam that I bought, well, it was not a right hand drive bean... OH no.... Left hooker, and needed a full on conversion.... Guess what I did....that's right.... converted it to right hand,,,
"Tell you what",,, (that's a London saying) I done the conversion in less than 2 hrs... and that's not knowing how to! I cut off those parts that are not required from the new beam and then welded in the new parts from the old beam... easy!!... well any welding after this amount of work would be easy!!!! HA
So once the new front beam was ready to be fitted, that's what I done, put it in.... There was a few lesson's learnt...
TIPS
| Takeout the old beam. | |
| Install new parts, ie, steering box | |
| install new beam | |
| then put in torsion bars, 1 at a time, same ones first, one by one |
Once all that is done it's fitting time for the torsion arms and hubs... this bit is piss easy... Fit everything back the way it was..then... well that's it, done. So as always here are some pictures of the work... it looks easier than it was!
Sorry that these pictures are with the beam in, my hand were too dirty to hold the camera!
| Side view | See those adjusters, see the axel stands... that's how! | top view, all this will be cleaned | the clamp spanner id to hold it together |
Next steps are to clean up the inside of the front section. I'll sandblast it all and then Hammerite it... once that is done its will be ready for the Waxoil.
![]()
I gave the fuel tank some more black paint today. It looks as good as new. Following that I finished off under the bonnet, paint the area behind the water bottle and brake fluid tank. What do you think? I didn't over do it with the paint.. keep it as original as poss
| How sweet | Look how clean! |  |
As that was drying it was time for the windows to go back in. First off I cleaned them up with washing up liquid and a cleaning pad... the type for the dishes!! Refitted the rubber and the reinstalled the windows. I had trouble with the window screen, the alley trim came out, I'll have to take it out and put it in again.
| Lets get the trim on Steve! |  |
 |
Once that was done it was time for the Waxoil rust prevention. This went inside the doors and I put loads of it down the heater channels....
![]()
I started on the fuel tank today. Scrapped it down then washed it down. Once dry I gave it 5 coats of Hammerite paint, sprayed on!
While the paint on the tank was drying I made my way to Volkspares and picked up a few parts... this was my list
| Left and right hand door window frame | |
| A pair of running boards | |
| 20 rubber trim holders | |
| boot and engine lid seal |
While in the shop I also picked up a new front beam, with adjusters already installed. I got this for a bargain at £50!! Well I think it was...
When I returned to the garage I could not wait to get that window trim in place.... that's what I did. It took me a few hour to fix up the door, but I managed it. The drivers door is now back to its factory settings!!! Like new!!
 |
 |
Now and before |
 |
![]()
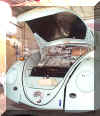
Today I started working on the inside of the trunk area. I cleaned the whole area under the hood with a cloth socked in thinners. I wiped over all surfaces. Amazing stuff really, it got all the crap of the paint work, got it looking like new in most areas. Following that I removed the water bottle and brake fluid tank. After getting these two item off the bug I removed the fuel tank.
Tip The water bottle just pulls out, one hard yank towards you and its out.
Once the bottle was out and the whole area cleaned down I primered the areas that needed some new paint. The target was to keep as much of the existing paint as possible. This done by masking off all the other areas.
| Here is the hood area, see that primer |  |
![]()
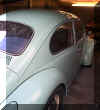
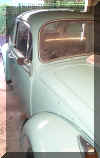
Now all the spraying is finished it is time for polishing. In the end I used 2 litres of colour on the bug and 2 litres of primer, that's equates to 5 layers of primer and 5 of the Bahama Bleu. Add all that to the original paint that was rubbed down and you get yourself some serious protection!!
As I said I polished the bug today, but prior to that I went over the whole car with 1500 grade wet and dry, I only needed I sheet of this. As I am not a professional there was the odd run here and there... this sanding removed all the imperfections and flattened the paint. Once that was done the used a compound all over the car... this was followed by a quality wax polish. The end result is and gleaming clear, smooth and crystal clear bug. I'll add some pictures later.
![]()
Well the first day of the month, December here, god time has gone fast. Today I continued with the top Colour coat. Prior to any spraying I sanded any imperfections and runs from yesterdays work. Thankfully there was only a few...
After that I applied two coats of colour. I must say it is coming out very well. The finish ion the roof is like glass, however, I am finding it had to get this finish all over. Some areas, like the doors are a bit patchy.
So here are a few more pictures of this beautiful Bahama Bleu bug
| Remember that roof channel?
A nice before and after shot |
Door as good as new! | A nice side shot |
![]()